Automatic Ordering
Automatic Ordering is the core feature of our platform. In order to work correctly, you will need to have the articles, supply point and the devices all configured correctly. You can get an overview of all your Auto Orders at Administration > Automatic Ordering.
Auto Orders usually execute on a defined repeating schedule, but can also be triggered manually.
Create Auto Order Config
On the first overview of available locations, first select the location your supply point belongs to, by clicking the Details button.
If your location has no existing auto order config yet, the configurations overview should be empty. Click Add Configuration to start setting up a new config. You must give the config at least a name, default reorder level and one of the integrations, preferably more. All the values here can be changed later on. We usually give the auto order the same name as the supply point it is going to be assigned to. depending on your usecase, this might differ.
Assign Auto Order Config to a Supply Point
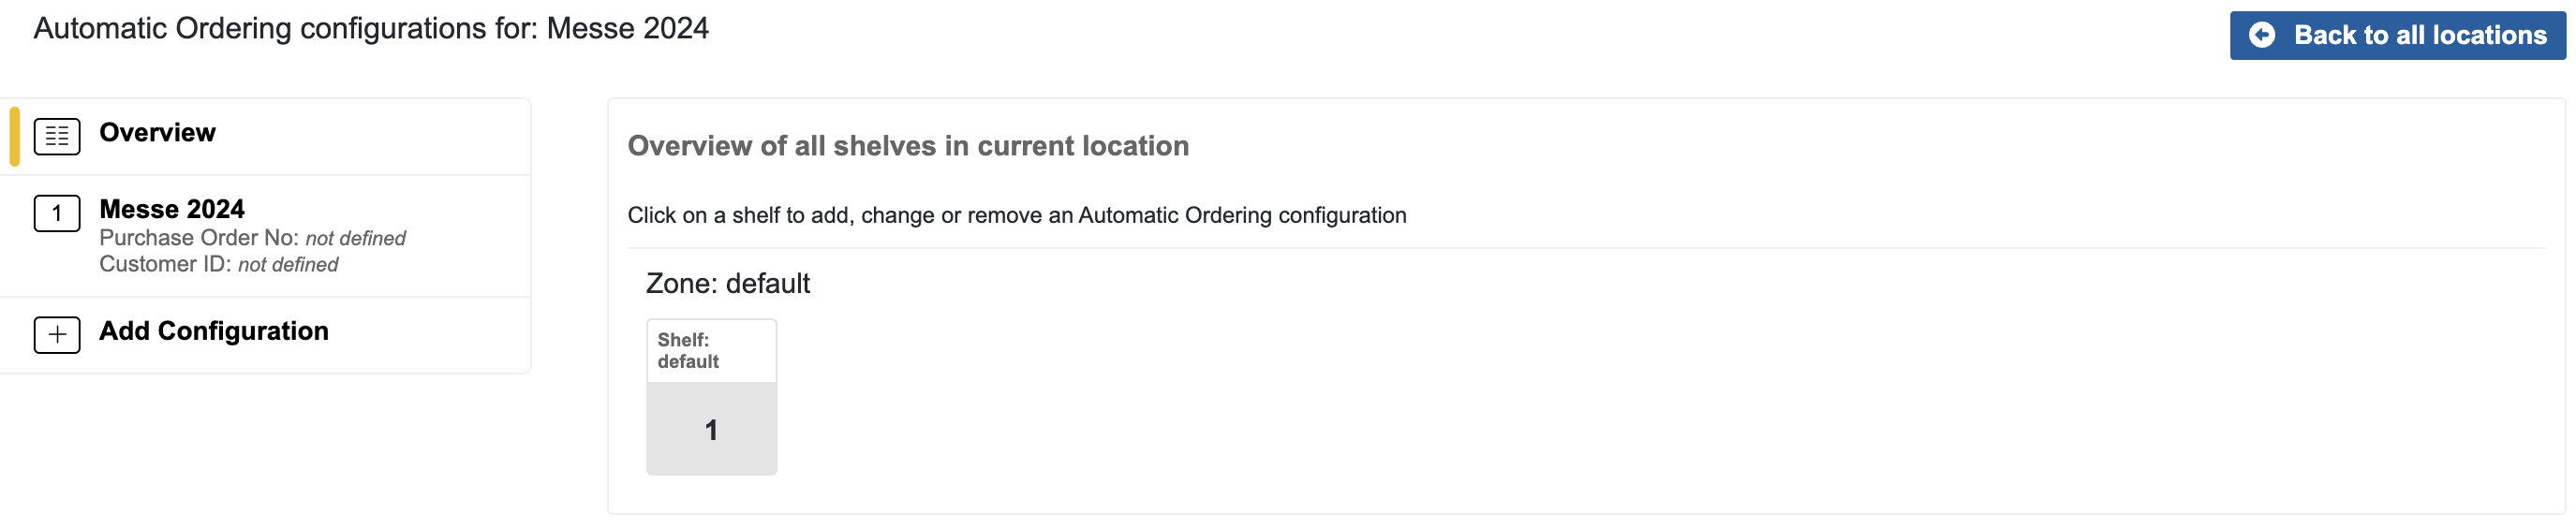
On the overview page you can assign a configuration to a supply point. click on the gray square, labeled by Shelf and select the supply point you want the auto order attached to. Confirm by clicking Update.
While it is possible to assign an Auto Order Config to more than one Supply Point, we strongly recommend to configure one config per supply point.
We use the terms shelf and shelves interchangeably with supply point and supply points. This will change in the near future. All references to shelves will be replaced by the more generic term supply points.
Assigning an Auto Order Config to more than one Supply Point might be subject to change in future versions.
Set desired stock levels
With an attached supply point, the auto order draws in the currently assigned devices, their stocks and calculated capacities. If you need to customize how much you want to store, navigate to the auto order config and select the tab Article Settings there. Each row can be edited by clicking on the button with the edit icon in the rightmost column. You can only set the reorder level, max stock level and note here. All other data is drawn from the article and needs to be updated there.
Integrations
Execution
Execution of the auto order should normally be set by a schedule.
In the Order Preview tab you can see when the next execution is scheduled to run and what it is going to order based off the current stock. You can also trigger the auto order manually by clicking the Execute button here. This will run the integration immediately.

Please test your integration with a manual execution at least once. If we can detect a misconfigured integration because of status codes returned by your services, we will show you an error here.
If everything is fine, you should have received the order in your system and a success message will be shown in our system.
Should you run into any trouble, please reach out to us and we will do our best to help you resolve the issue.
We strongly recommend setting a schedule for repeating execution. This can be done in the Config tab. Click on
Edit next to Schedule Configuration. A dialogue will open where you can set the schedule and activate or
deactivate the schedule by using the checkbox next to Active.
The Next Execution is only shown, if the schedule is currently active.
Confirm the dialogue by clicking Ok.